Skip to content

Post-Processing

Post-processing refers to effects that are applied to an image after rendering. Examples include tone-mapping, blurring, antialiasing, bloom effects, glitch effects, and many more. It typically involves rendering the scene to a render target and then using the target’s texture as input to a separate fragment shader.

Three.js provides many of these effects through its post-processing addon, however for simple effects that don’t require multiple passes, using the addon might be excessive. This article will explain how to create a very simple post-processing flow tath utilizes a specific triangle that covers the entire canvas.

The main idea is to create a geometry that will cover the entire canvas. This could easily be achieved with two triangles but there’s a clever trick that uses only single triangle to achieve the same result.

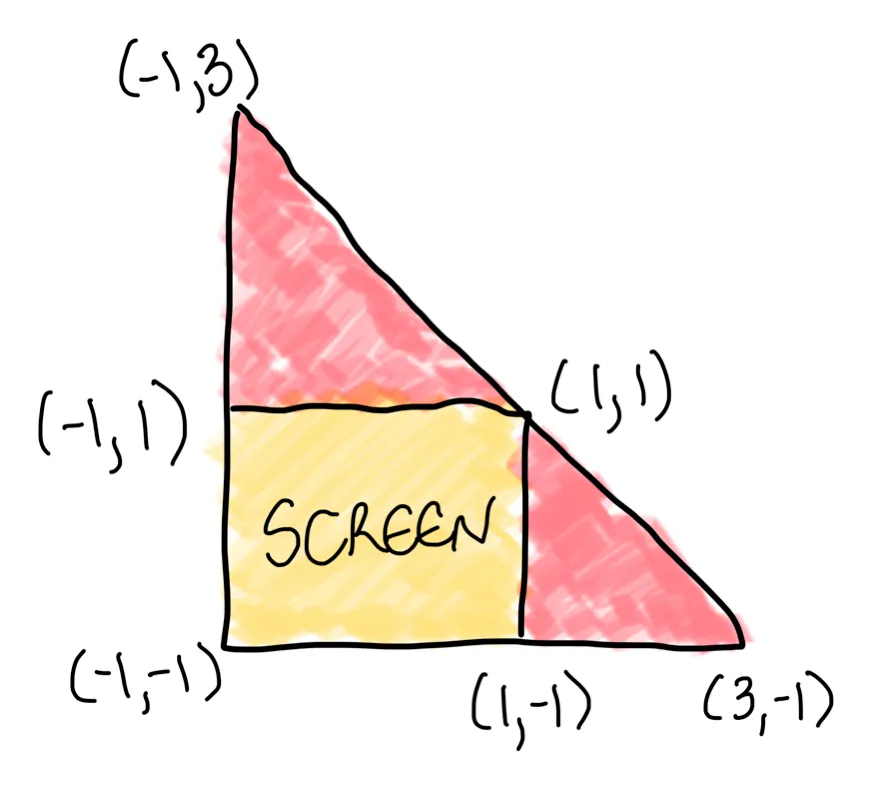
Notice how the triangle’s hypotenuse only touches the screen at the top left corner. Every fragment that is outside of the screen won’t be visible.

Three.js provides a FullScreenQuad class out of the box.

import { FullScreenQuad } from "three/examples/jsm/postprocessing/Pass.js";
const material = new ShaderMaterial({
fragmentShader,
uniforms,
vertexShader,
});
const quad = new FullScreenQuad(material);

The scene is rendered into a render target whose texture is then sent into a custom fragment shader. The uv coordinates of the geometry are used as an index into the texture in the fragment shader. Three’s FullScreenQuad conveniently provides the uvs through a buffer attribute. We just need to pass the uvs along to the fragment shader.

vertex.glsl
varying vec2 vUv;
void main() {
vUv = uv;
gl_Position = vec4(position, 1.0);
}

Then in the fragment shader, the uvs are used to get the color of the rendered texture.

fragment.glsl
uniform sampler2D uScene;
varying vec2 vUv;
void main() {
vec4 color = texture2D(uScene, vUv);
// do something interesting with the fragment
gl_FragColor = color;
}

The render pipeline is pretty simple. First the scene is rendered to the target. Then the renderer’s target is set back to the canvas, and the quad is rendered.

const render = () => {
const last = renderer.getRenderTarget();
renderer.setRenderTarget(renderTarget);
renderer.render(scene, camera);
renderer.setRenderTarget(last);
quad.render(renderer);
};